Save
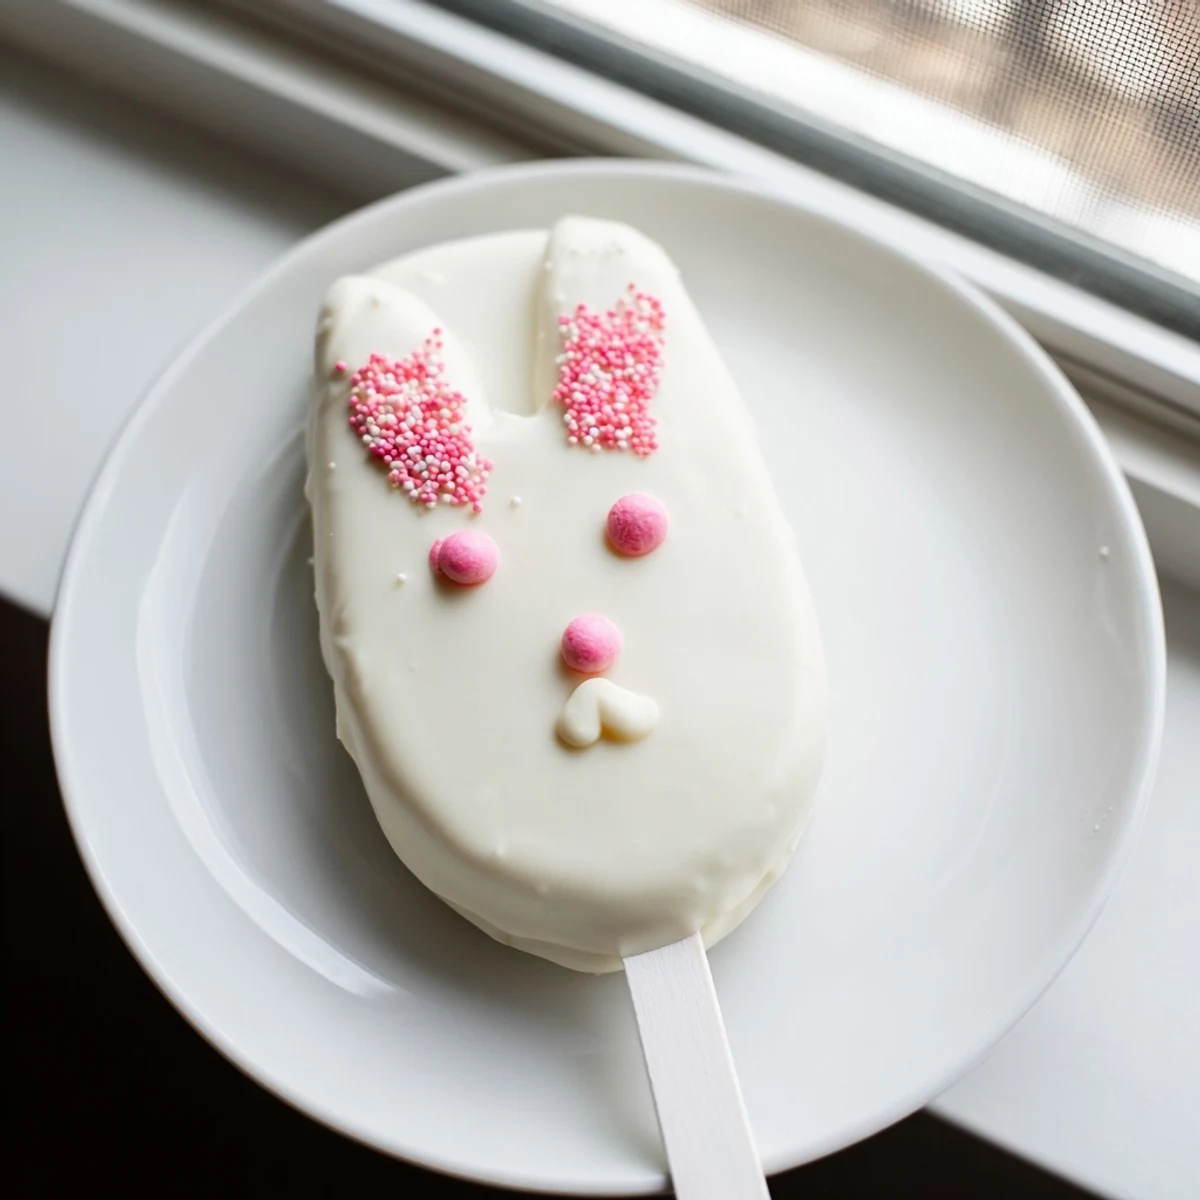
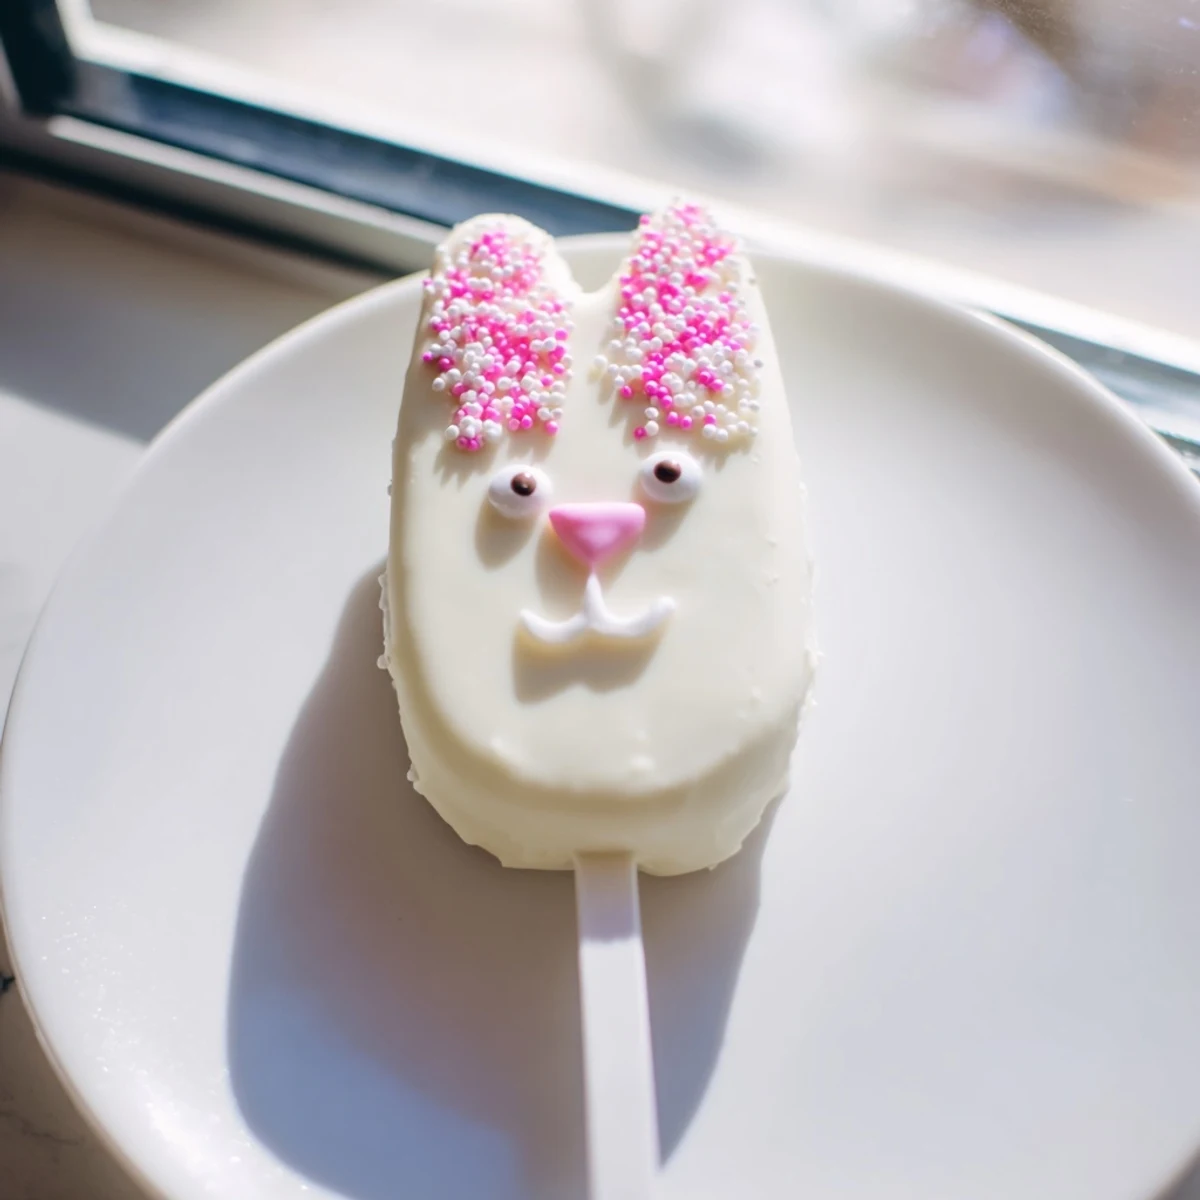
Save Transform simple vanilla cake crumbs into delightful bunny-shaped cakesicles coated in luxurious white chocolate. These handheld treats combine cake and frosting into a dough, shaped into adorable bunny faces before being dipped in melted white chocolate and decorated with edible details.
The process comes together in just one hour, yielding eight festive desserts that kids and adults will love. Customize with different food coloring shades, sprinkle combinations, or fondant ears to create unique bunny personalities for your Easter gathering.
The kitchen counter was covered in white chocolate splatters and my daughter was already wearing more of it on her face than made it onto the actual treats. We'd decided at 9pm that Easter needed something beyond the usual cookies and these bunny cakesicles seemed like the perfect chaotic adventure to tackle together.
Last Easter morning, my niece accidentally knocked over the plate of freshly made bunny cakesicles right before guests arrived. Instead of panic, we all started laughing as the bunny faces looked up at us from the floor, and we spent the next ten minutes decorating the slightly battered survivors with extra details. They became the most talked-about dessert of the day, mostly because of their battle scars and our collective giggling.
Ingredients
- Vanilla cake crumbs: Use day-old cake or cupcakes for the best texture, fresh cake can turn into glue
- Cream cheese: Absolutely essential for binding, bring to room temperature or you'll get frustrating lumps
- Unsalted butter: Works with the cream cheese to create that perfect truffle-like consistency
- Powdered sugar: Just enough sweetness to balance the tangy cream cheese without making it cloying
- Vanilla extract: Don't skip this, it's what makes them taste like a professional bakery treat
- White chocolate: High-quality melts make a huge difference in the final coating's smoothness
- Cakesicle sticks: Insert them before the cake mixture firms up or you'll have cracked bunnies everywhere
Instructions
- Mix your cake base:
- Combine cake crumbs, cream cheese, butter, powdered sugar, and vanilla in a medium bowl until the mixture holds together like soft dough when squeezed
- Shape the bunnies:
- Divide into 8 portions and form flattened oval shapes, gently pressing the mixture so it's compact but not dense
- Add the sticks:
- Push a cakesicle stick about halfway into each shape, then refrigerate for 20-30 minutes until firm to the touch
- Melt the chocolate:
- Heat white chocolate in 30-second intervals, stirring thoroughly between each burst until completely smooth and glossy
- Dip and coat:
- Submerge each cake pop in the melted chocolate, tap gently against the bowl edge to remove excess, and let any excess drip off
- Decorate while wet:
- Immediately add candy eyes, sprinkles, or fondant ears while the chocolate is still soft enough to hold decorations
- Set completely:
- Let them firm up at room temperature for about 30 minutes, or refrigerate for 10-15 minutes if you're impatient like me
 Save
Save My friend Sarah made these for her daughter's classroom Easter party and sent me a photo of 24 tiny bunny faces lined up on her dining table. She said the kids were so excited about the cute shapes that they didn't even notice she'd accidentally used lemon cake instead of vanilla, proving that presentation really does matter sometimes.
Getting That Perfect Consistency
The dough should feel like Play-Doh that's been slightly warmed in your hands. Too dry and the sticks will fall out during dipping, too wet and they'll slide right off the stick. Trust me, I've experienced both disasters.
Decoration Magic
The most charming bunnies I've made were the slightly imperfect ones with crooked ears and mismatched eyes. There's something wonderfully authentic about treats that look like they were made with love rather than manufactured precision.
Storage & Make-Ahead Tips
These actually taste better after sitting overnight in the fridge because the flavors meld together beautifully. The white chocolate stays glossy if you keep them away from humidity and direct sunlight.
- Make the cake mixture up to 2 days ahead and store in the refrigerator
- Dip and decorate the morning of your event for the freshest appearance
- Keep them flat during storage or the chocolate will develop flat spots where it touches surfaces
 Save
Save These little bunnies have become our Easter tradition because they're impossible to eat without smiling. Something about food on a stick brings out the kid in everyone.
Recipe FAQs
- → How far in advance can I make these cakesicles?
-
You can prepare the cake mixture and shape the bunnies up to 2 days ahead, storing them in the refrigerator. Dip and decorate within 24 hours of serving for the freshest appearance, though they'll keep refrigerated for up to 3 days once assembled.
- → Can I use chocolate cake instead of vanilla?
-
Absolutely! Chocolate cake crumbs work beautifully with white chocolate coating, creating a classic flavor combination. You can also experiment with lemon, red velvet, or carrot cake for seasonal variations that complement the Easter theme.
- → What if I don't have cakesicle molds?
-
While molds help create uniform shapes, you can easily hand-form the bunny faces using your hands or a spoon. Simply shape the dough into flattened ovals, gently press a well for the stick, and chill thoroughly before dipping to maintain the shape.
- → Why is my white chocolate coating cracking?
-
Cracking usually occurs when the chilled cakesicles are too cold when dipped, or when the coating is too thick. Let your shaped bunnies sit at room temperature for 5-10 minutes after refrigeration, and ensure your chocolate is melted to a smooth, pourable consistency.
- → Can I freeze these bunny cakesicles?
-
Yes! Freeze undipped shaped bunnies for up to 1 month, wrapping individually to prevent freezer burn. Once dipped and decorated, freezing isn't recommended as the coating may develop condensation and lose its smooth appearance upon thawing.
- → What's the best way to melt white chocolate for coating?
-
Melt white chocolate in 30-second intervals at 50% power, stirring thoroughly between each burst. This prevents seizing and burning. For an extra smooth coating, add 1 teaspoon of vegetable oil or coconut oil per cup of melted chocolate.