 Save
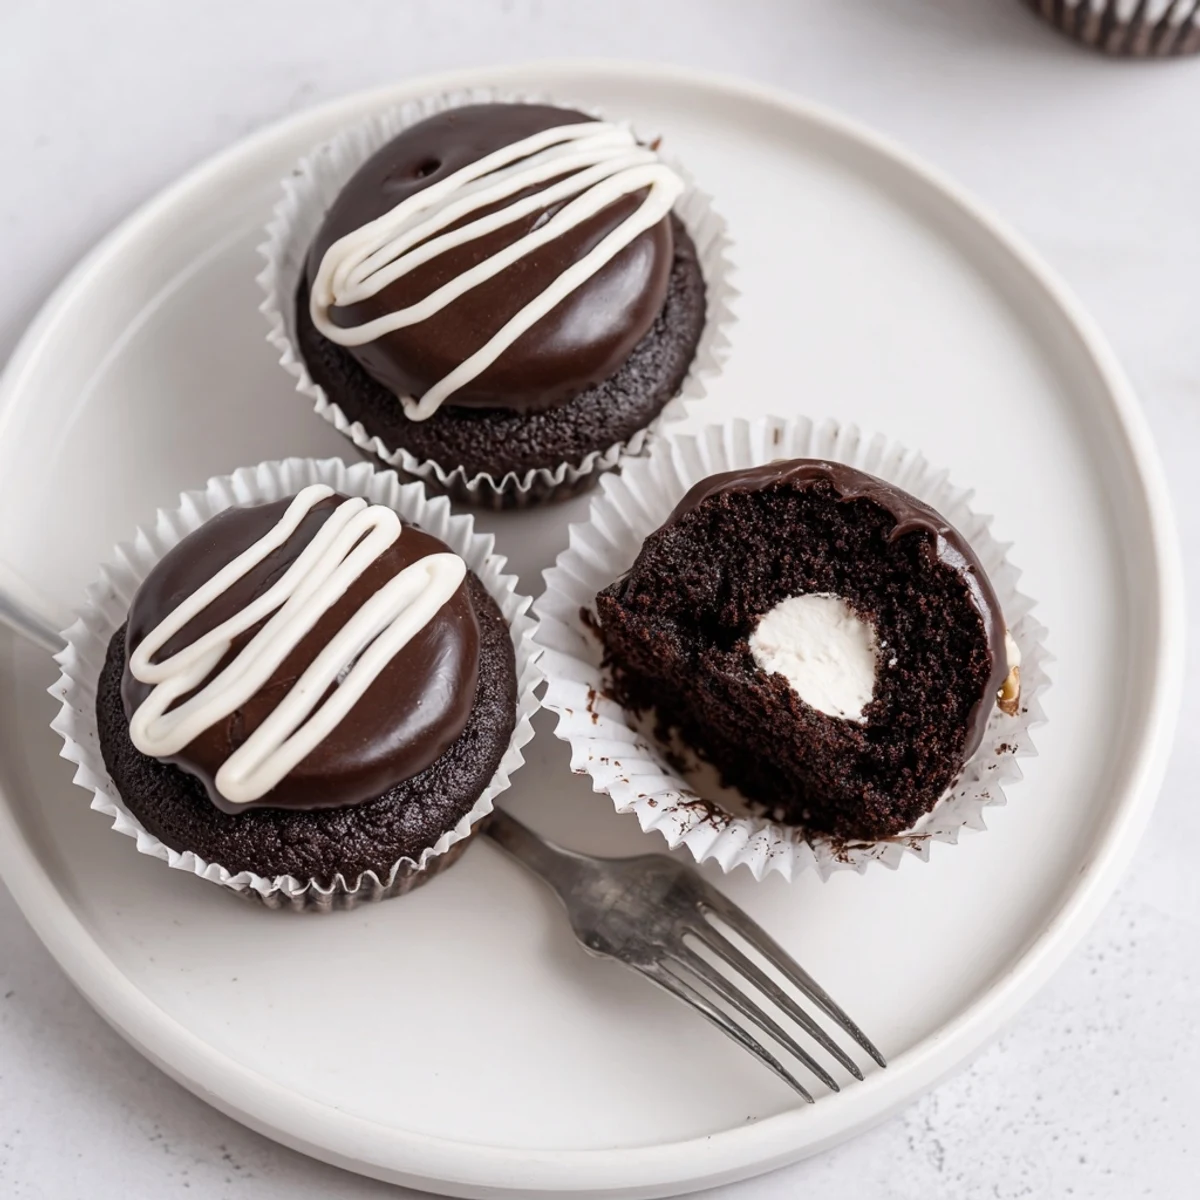
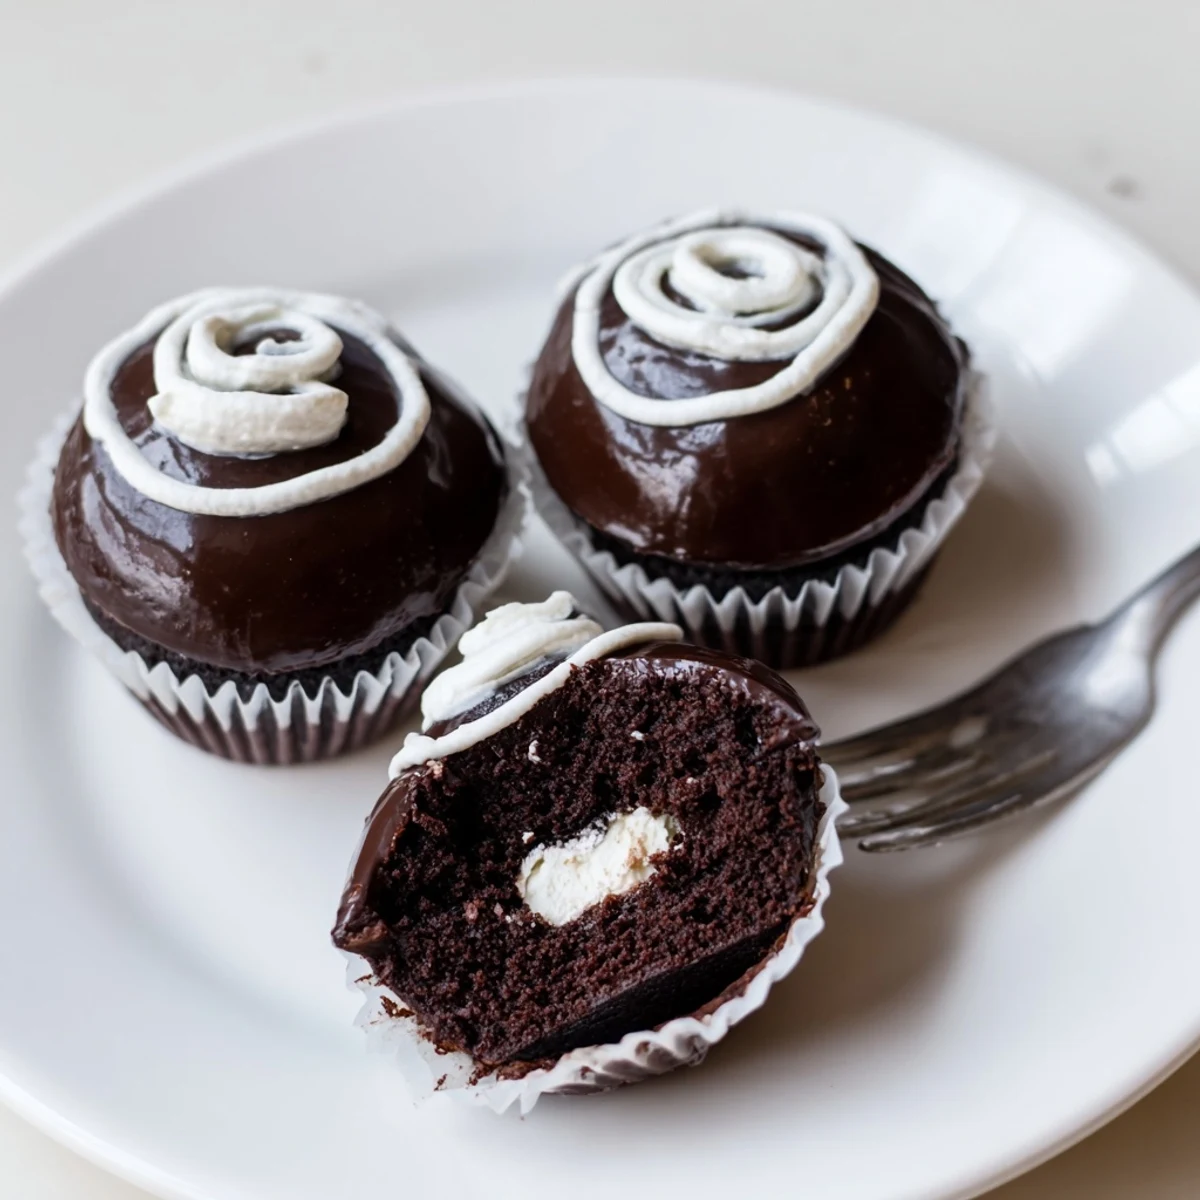
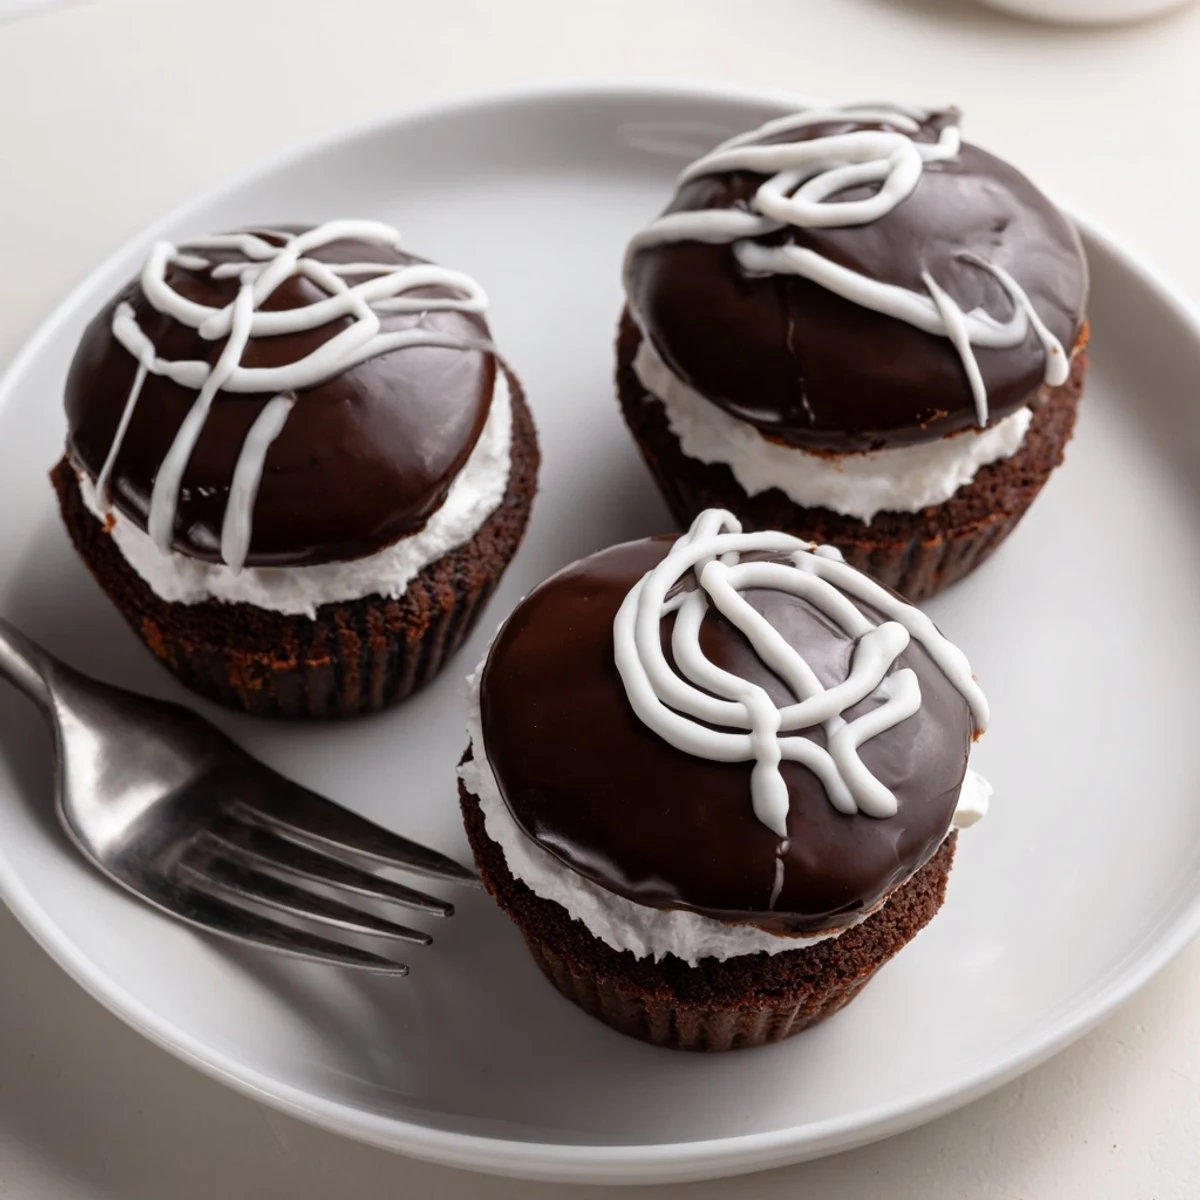
Save These homemade Hostess cupcakes deliver everything you love about the classic store-bought treat—rich chocolate cake, pillowy marshmallow cream filling, and a shiny chocolate ganache top finished with that signature white icing swirl.
While they require a few separate components, each step is straightforward. Bake the cupcakes, whip up the fluffy filling, prepare a quick ganache, and pipe the finishing swoops. Allow time for cooling and setting so each element shines.
Perfect for birthdays, bake sales, or anytime nostalgia calls, these cupcakes are well worth the effort and taste far better than anything from a package.
The crinkly wrapper, the squiggle of white icing, the surprise of cream when you pulled it apart, Hostess cupcakes were my entire childhood in a single snack. I never imagined I could recreate that magic at home until a rainy Saturday when my pantry was bare and my cravings were loud. Three batches later, I finally cracked the code, and honestly, these taste better than anything from a package. My kitchen smelled like a bakery and I felt like a genius.
My neighbor Dave knocked on my door the afternoon I made these, supposedly to return a borrowed wrench. He ate four cupcakes standing in my doorway and forgot why he came over. We laughed until my dog started barking at the icing bag.
Ingredients
- All-purpose flour (1 cup, 120g): Gives the cake its tender crumb without making it dense, spoon and level for accuracy.
- Unsweetened cocoa powder (1/2 cup, 45g): Dutch-processed gives a deeper flavor but natural works beautifully too.
- Granulated sugar (1 cup, 200g): Balances the bitterness of cocoa and keeps the crumb moist.
- Baking soda and baking powder (1/2 tsp and 1 tsp): Together they give the perfect rise, do not skip either one.
- Salt (1/4 tsp): Just enough to make the chocolate taste like chocolate.
- Buttermilk, room temperature (1/2 cup, 120ml): Acid reacts with baking soda for lift and adds a subtle tang.
- Vegetable oil (1/2 cup, 120ml): Oil keeps these cupcakes softer than butter would, even after refrigeration.
- Large eggs, room temperature (2): Room temp eggs blend more smoothly into the batter.
- Vanilla extract (2 tsp for cake, 1 tsp for filling): Use the real stuff, imitation vanilla dulls everything.
- Hot water (1/2 cup, 120ml): Blooms the cocoa and makes the batter surprisingly thin, trust the process.
- Unsalted butter, softened (1/3 cup, 75g): The base of the filling, let it truly soften or you will fight lumps.
- Powdered sugar (3/4 cup, 90g for filling, 1/4 cup, 30g for swirl): Dissolves into the filling for silky texture.
- Marshmallow creme (1 cup, 220g): This is the secret to that unmistakable squishy center.
- Milk (1 to 2 tsp for filling, 1 tsp for swirl): Added only if consistency needs adjusting.
- Semi-sweet chocolate chips (1/2 cup, 85g): Melt into the richest, shiniest ganache cap.
- Heavy cream (1/4 cup, 60ml): Steeped hot and poured over chocolate for instant ganache.
Instructions
- Preheat and prepare:
- Set your oven to 350 degrees F and line a 12-cup muffin tin with paper liners. This small step keeps cleanup easy and gives the cupcakes their signature frilled edge.
- Whisk the dry team:
- In a large bowl, whisk together the flour, cocoa powder, sugar, baking soda, baking powder, and salt until evenly blended. Break up any cocoa lumps with your fingers.
- Bring in the wet ingredients:
- Pour in the buttermilk, oil, eggs, and vanilla, mixing gently until just combined. Splash in the hot water and stir until the batter is smooth and liquidy, it will look wrong but it is perfect.
- Fill and bake:
- Divide batter evenly among the liners, filling each about two-thirds full. Bake 18 to 20 minutes until a toothpick slides out clean and the tops spring back.
- Cool completely:
- Transfer the pan to a wire rack and let the cupcakes cool entirely before even thinking about filling them. Warm cupcakes will melt your beautiful cream center.
- Whip the cream filling:
- Beat the softened butter until light and fluffy, then add powdered sugar and beat one minute more. Fold in the marshmallow creme and vanilla until cloud-like, add a splash of milk only if it feels stiff.
- Core and fill:
- Use a small knife or cupcake corer to carve a shallow well from the center of each cooled cupcake. Pipe the filling generously into each well and replace the little cake caps if you saved them.
- Make the ganache:
- Heat the heavy cream in a small saucepan until it steams but never boils, then pour it over the chocolate chips. Wait two minutes, then stir slowly until glossy and thick.
- Glaze the tops:
- Spoon ganache over each cupcake or dip them upside down for a smoother coat. Let them rest until the chocolate sets into a firm shell.
- Pipe the iconic swirl:
- Stir powdered sugar with just enough milk to reach a pipeable consistency, then transfer to a zip-top bag with a tiny corner snipped off. Pipe a loopy squiggle across each cupcake top and feel the nostalgia hit.
 Save
Save The moment I finished the white squiggle on the last cupcake, my daughter walked in and gasped like I had built a roller coaster in the kitchen. She picked one up, split it open, and licked the filling clean out before even taking a bite of cake. That reaction alone was worth every dirty bowl in the sink.
Storage That Actually Works
These cupcakes stay lovely in the refrigerator for up to three days if you keep them in a single layer inside an airtight container. Cold temperatures firm the filling and ganache nicely but always let them sit at room temperature for about twenty minutes before serving so the cake softens back up.
Flavor Twists Worth Trying
Once you master the classic version, start playing around with the filling by swapping vanilla extract for almond, coconut, or even a splash of peppermint. A friend added a tablespoon of peanut butter to the marshmallow filling and brought the whole batch to a potluck where they vanished in ten minutes flat.
Tools That Save You Trouble
You do not need fancy equipment but a few things make the process genuinely easier, especially on your first attempt.
- A cupcake corer costs about five dollars and saves you from mangling the centers with a knife.
- Disposable piping bags mean zero cleanup for filling and icing work.
- Always sift your powdered sugar for the white swirl or it will clog the tiniest tip you have.
 Save
Save Make a batch for someone who loved these as a kid and watch their face light up with recognition. Homemade always tastes better when memory is the secret ingredient.
Recipe FAQs
- → How do I get the cream filling inside the cupcakes?
-
Use a small paring knife or cupcake corer to remove a cone-shaped piece from the center of each cooled cupcake. Fill a piping bag with the marshmallow cream filling and pipe it into the hollowed-out center. You can replace the removed cake tops before adding the ganache if desired.
- → Can I make these cupcakes ahead of time?
-
Yes, you can bake the cupcakes a day in advance and store them in an airtight container at room temperature. Fill and glaze them the next day. Fully assembled cupcakes can be refrigerated for up to three days—just let them come to room temperature before serving for the best texture.
- → Why is my cupcake batter so thin?
-
Don't worry—the batter is meant to be thin thanks to the addition of hot water. This is what produces a moist, tender crumb. Simply pour it carefully into the liners and bake as directed. The cupcakes will rise properly and develop a light, fluffy texture.
- → What can I substitute for marshmallow creme in the filling?
-
If you can't find marshmallow creme, you can make a Swiss meringue buttercream and fold in melted mini marshmallows. Alternatively, a simple buttercream made with butter, powdered sugar, vanilla, and a splash of milk will still taste delicious, though it won't have the same marshmallow flavor.
- → How do I get the signature white swirl on top?
-
Mix powdered sugar with just enough milk to create a thick but pipeable icing. Transfer it to a piping bag fitted with a fine round tip or a zip-top bag with a tiny corner snipped off. Pipe a continuous curving line back and forth across each glazed cupcake to recreate the classic Hostess squiggle.
- → Can I use Dutch-processed cocoa powder instead of regular?
-
Absolutely. Dutch-processed cocoa will give the cupcakes a deeper, richer chocolate flavor and a darker color. Since the batter also includes baking soda, the leavening will still work properly. It's a great option if you want a more intense chocolate experience.