 Save
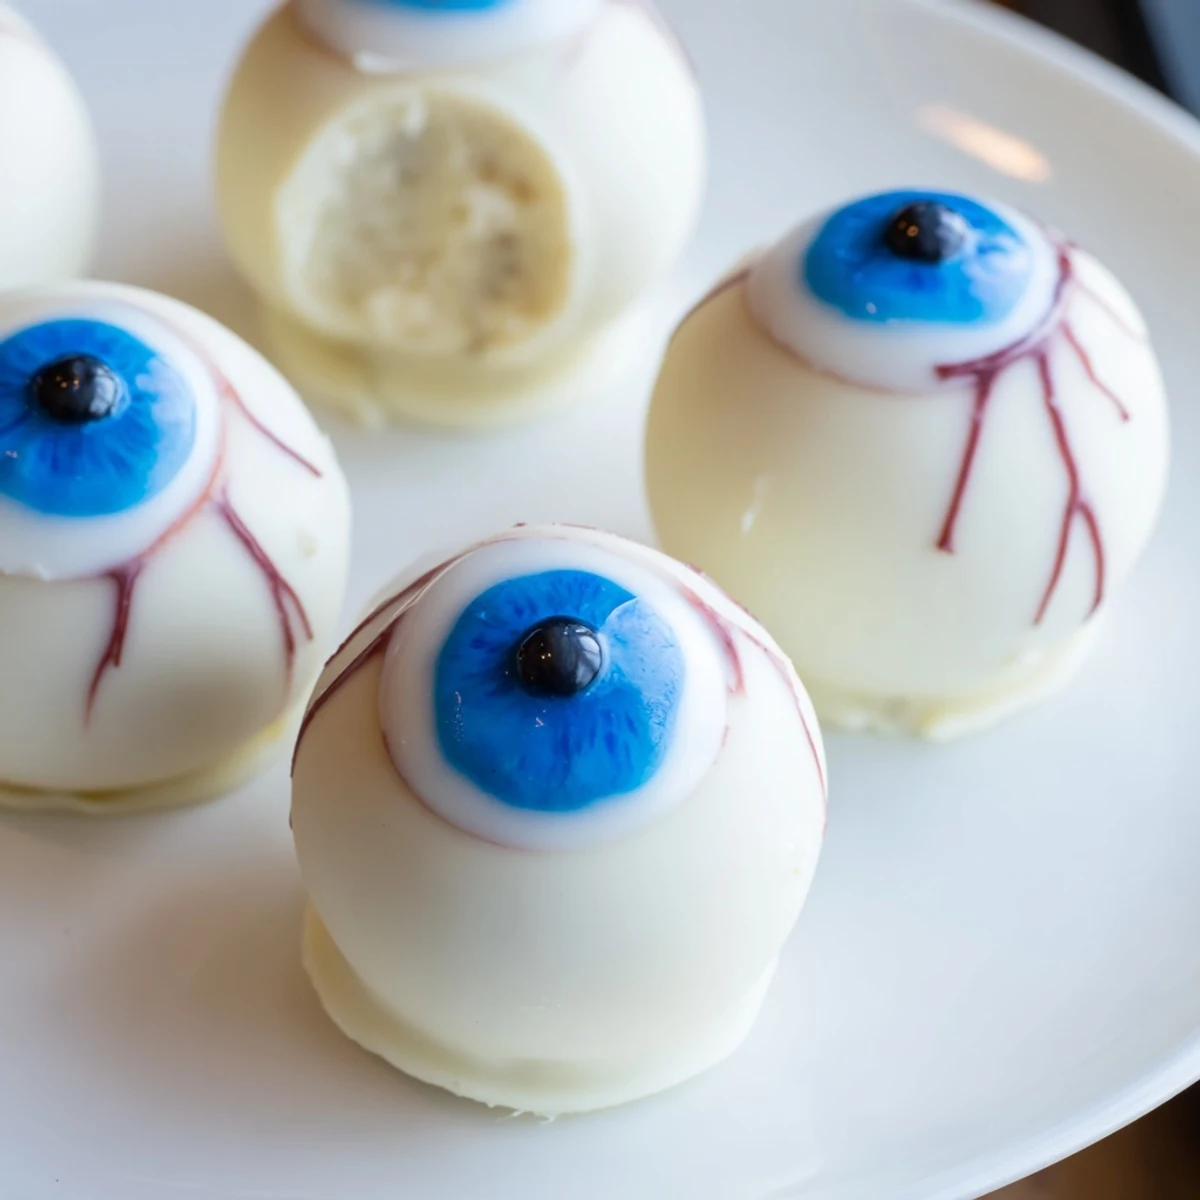
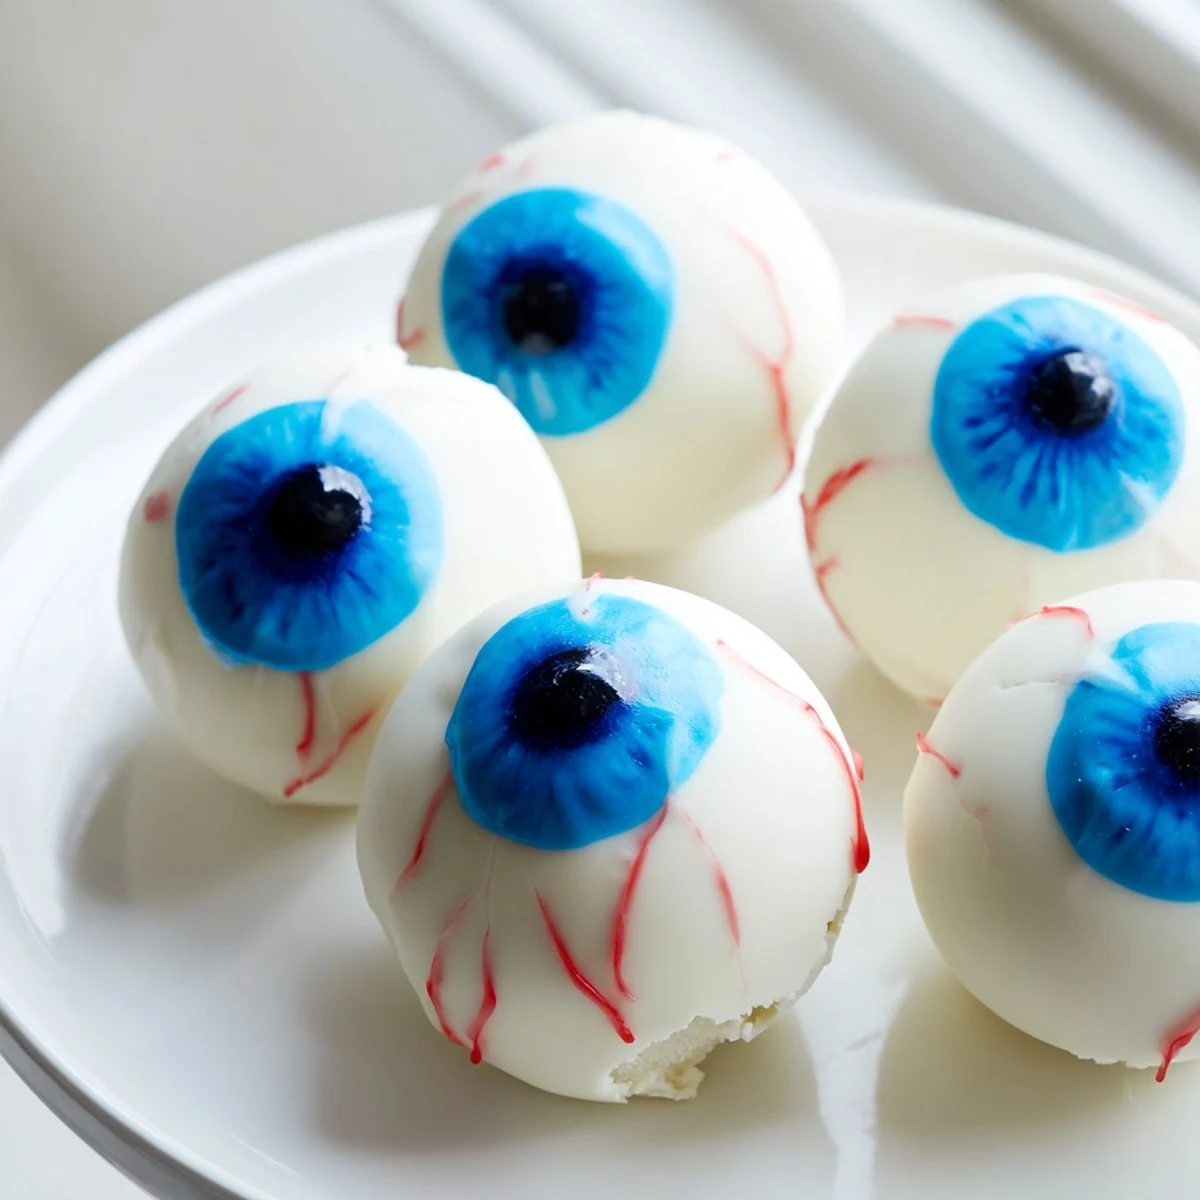
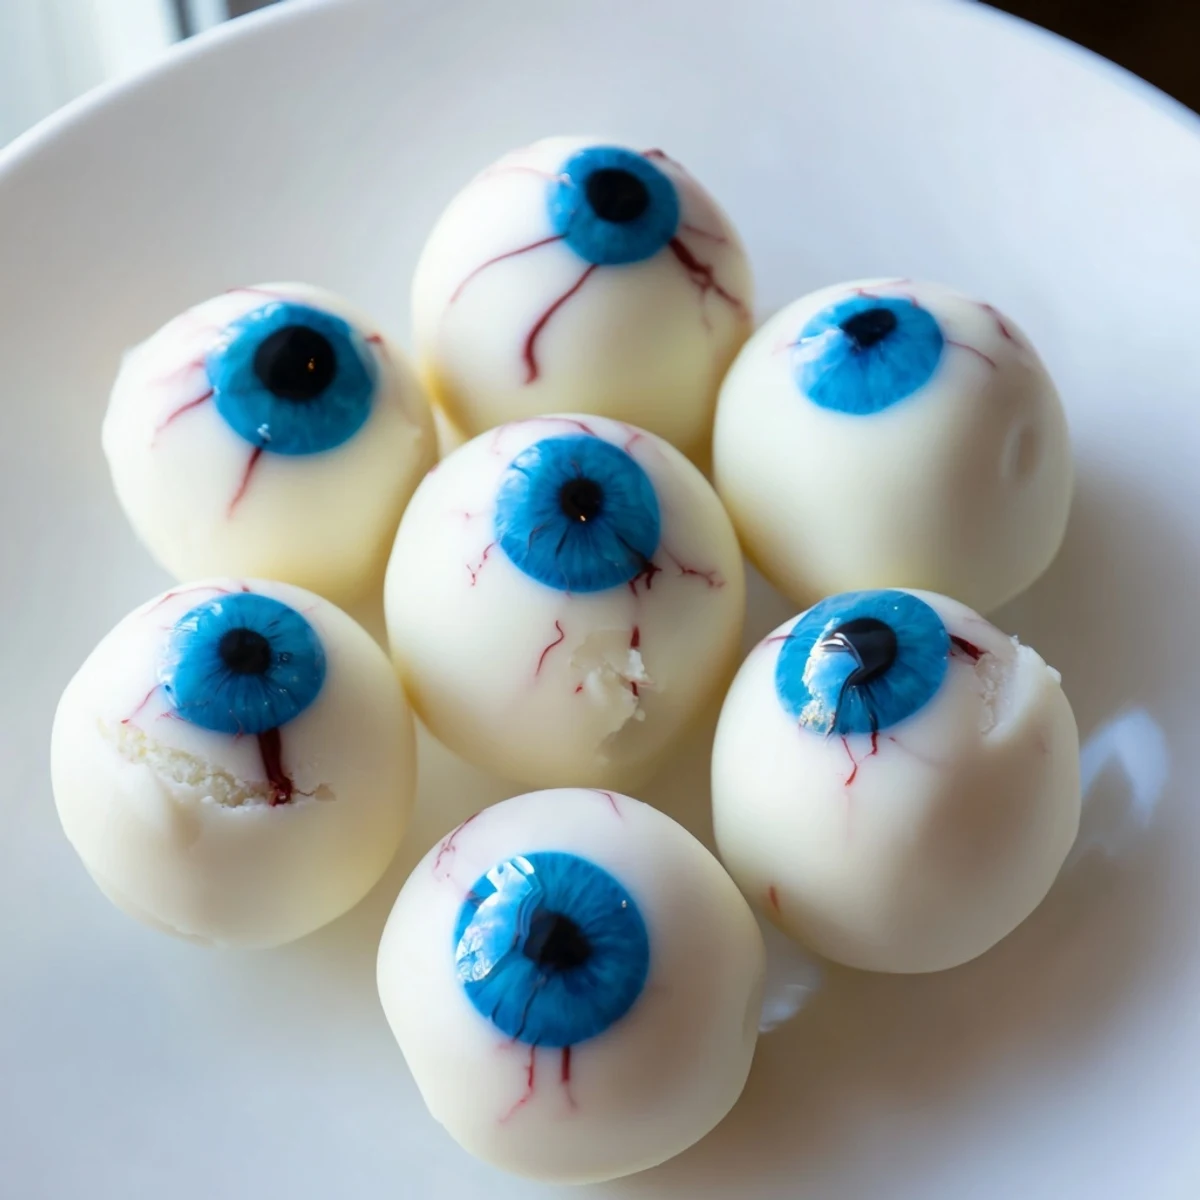
Save These Halloween cake eyeballs combine crumbled vanilla cake with cream cheese frosting, shaped into spheres and dipped in white chocolate. Each eyeball gets a colored iris using blue or green candy melts, topped with a dark chocolate pupil and detailed with red gel veins for that authentic spooky look. The process involves baking a basic vanilla cake, crumbling it once cooled, mixing with frosting, rolling into balls, chilling for stability, then carefully coating and decorating. The result is 24 impressive Halloween treats that taste as good as they look, ideal for parties and gatherings.
Last Halloween, my kitchen looked like a crime scene, but in the best way possible. Red gel splatters dotted the counter, white chocolate puddles hardened into suspicious shapes, and I could not stop laughing at my own reflection surrounded by dozens of googly eyeballs. My daughter walked in, took one look at the tray of cake pops, and whispered with perfect theatrical gravity, "Mom, whose eyes are these anyway?" That moment sold me forever on the genius of turning something as innocent as cake into wonderfully creepy edible art.
I first made these for my office Halloween potluck, expecting maybe polite nibbles from a few brave souls. Instead, grown adults were posing for photos holding the eyeballs up to their faces, making terrible puns about "keeping an eye on the snack table," and genuinely competing to see who could make the most convincing bloodshot veins. The colleague who swore she hated sweets ate three, claiming they tasted different because they were shaped like organs.
Ingredients
- Vanilla cake mix (400g homemade works too): Using a quality mix saves time without sacrificing flavor, but homemade gives you control over sweetness and texture
- 3 large eggs: Room temperature eggs incorporate better into the batter for a more even crumb
- 120ml vegetable oil: Oil keeps the cake moist longer than butter, which is crucial when rebaking into pops
- 240ml water: The liquid amount can be adjusted slightly based on your cake mix requirements
- 100g cream cheese: Full fat cream cheese creates a richer, more stable frosting that holds the cake crumbs together perfectly
- 100g unsalted butter: Softening the butter completely prevents grainy frosting and makes mixing effortless
- 200g powdered sugar: Sifting the sugar first eliminates those frustrating tiny lumps in your frosting
- 1 tsp vanilla extract: Pure vanilla makes a noticeable difference in the final flavor profile
- 400g white chocolate or candy melts: Candy melts set faster and create a smoother coating than chocolate, which needs tempering
- 50g dark chocolate or black candy melts: These tiny dots are surprisingly important for the creepy factor
- Blue or green candy melts: Have fun mixing these to create different eye colors for variety
- Red gel food coloring: Gel coloring works better than liquid for veins because it does not make the coating sticky
Instructions
- Bake and cool the cake:
- Preheat your oven to 180°C (350°F) and prepare the vanilla cake according to package or recipe instructions. Let it cool completely because warm cake will melt your frosting and create a sticky mess that refuses to form balls.
- Create fine cake crumbs:
- Crumble the cooled cake into a large bowl using your hands or a fork until you have fine, uniform crumbs. Taking your time here ensures the final texture is smooth rather than chunky.
- Prepare the frosting:
- In a separate bowl, beat the cream cheese, butter, powdered sugar, and vanilla extract together until completely smooth. This mixture acts as the glue that holds your eyeballs together.
- Combine and test:
- Mix the frosting with the cake crumbs until fully combined, then squeeze a small amount in your hand. If it holds together without being overly sticky, you have the perfect ratio.
- Form the eyeballs:
- Scoop out tablespoons of the mixture and roll them into 24 balls, placing them on a parchment-lined tray. Working quickly helps prevent the mixture from warming up and becoming difficult to handle.
- Chill thoroughly:
- Freeze the balls for 20 minutes until firm but not rock hard. This step is non-negotiable unless you want your eyeballs to slide off the dipping stick or fall apart in the melted chocolate.
- Prepare the white coating:
- Melt the white chocolate or candy melts gently, either in the microwave in short bursts or over a double boiler. Let it cool slightly so it is not hot enough to melt your cake balls.
- Dip for the base:
- Dip each cake ball in the melted coating, fully enrobing it and letting excess drip off, then place it back on the tray. Work efficiently because the coating sets surprisingly fast.
- Add the iris:
- Pipe or dip a small amount of colored candy melt onto the center of each ball while the white coating is still soft. Making these slightly off-center gives the eyeballs a more realistic, unsettling quality.
- Create pupils:
- Once the irises are set, add a small dot of dark chocolate or black candy melt for the pupil. A toothpick works beautifully for this tiny detail.
- Draw the veins:
- Use red gel food coloring or decorating gel to draw squiggly veins radiating from the colored iris outward. Less is more here, as thin, subtle veins look creepier than thick obvious ones.
- Set and serve:
- Allow all decorations to set completely, about 15 to 20 minutes, before serving. These keep well in the refrigerator for several days if they last that long.
 Save
Save The year I made these for my daughter's birthday party (her October birthday has its advantages), one dad quietly confided that he had been avoiding the dessert table because he thought the eyes were real. His face when he finally took a bite and realized it was cake was absolutely priceless.
Making Them Ahead
These cake eyeballs actually improve with a day in the refrigerator, as the flavors meld together beautifully. I have made them up to three days in advance, storing them in an airtight container between layers of wax paper to prevent sticking. The white coating stays shiny and the decorations remain intact, making these perfect for busy Halloween party prep.
Flavor Variations
While vanilla is classic, chocolate cake creates a dramatically dark eye that some find even creepier. Red velvet cake with cream cheese frosting adds an extra bloody element that fits the theme perfectly. For adults only, a splash of rum or coffee in the cake mixture adds sophisticated depth that contrasts wonderfully with the whimsical presentation.
Presentation Ideas
Serving these in a shallow bowl that resembles a petri dish or laboratory specimen container takes the presentation to another level. I once arranged them on a platter with small plastic spiders scattered around, which looked impressively professional for minimal effort.
- Place them on black napkins or a dark platter for maximum contrast and creepiness
- Add a few smaller "broken" eyeballs for extra gore effect
- Label them "Experimental Specimens" for a mad scientist themed party
 Save
Save There is something uniquely satisfying about serving food that makes people shriek with delight before they even take a bite. These eyeballs have become my most requested Halloween treat, and I suspect they might become yours too.
Recipe FAQs
- → How far in advance can I make these Halloween eyeballs?
-
You can prepare the cake balls up to 3 days ahead. Store them in an airtight container in the refrigerator. The chocolate coating stays fresh and the cake remains moist. For best results, add the red gel veins on the day of serving to prevent smudging.
- → Can I use homemade cake instead of cake mix?
-
Absolutely. You can use 400g of any homemade vanilla cake, pound cake, or even brownies for a darker center. The key is ensuring the cake is completely cooled before crumbling and mixing with frosting.
- → What if I don't have candy melts for decorating?
-
You can use melted white chocolate chips with a drop of food coloring for the iris. Dark chocolate chips work for pupils. For the veins, any red gel or thinned red food coloring works perfectly as a substitute.
- → Why do my cake balls fall apart when dipping?
-
This usually means the mixture is too warm or the ratio of frosting to cake is off. Try adding more cake crumbs or chilling the balls longer. They should be firm and hold their shape before coating.
- → Can I freeze these Halloween treats?
-
Yes, freeze undecorated cake balls for up to 2 months. Thaw in the refrigerator before coating with chocolate and adding decorations. Once decorated, they're best kept refrigerated rather than frozen.