Save
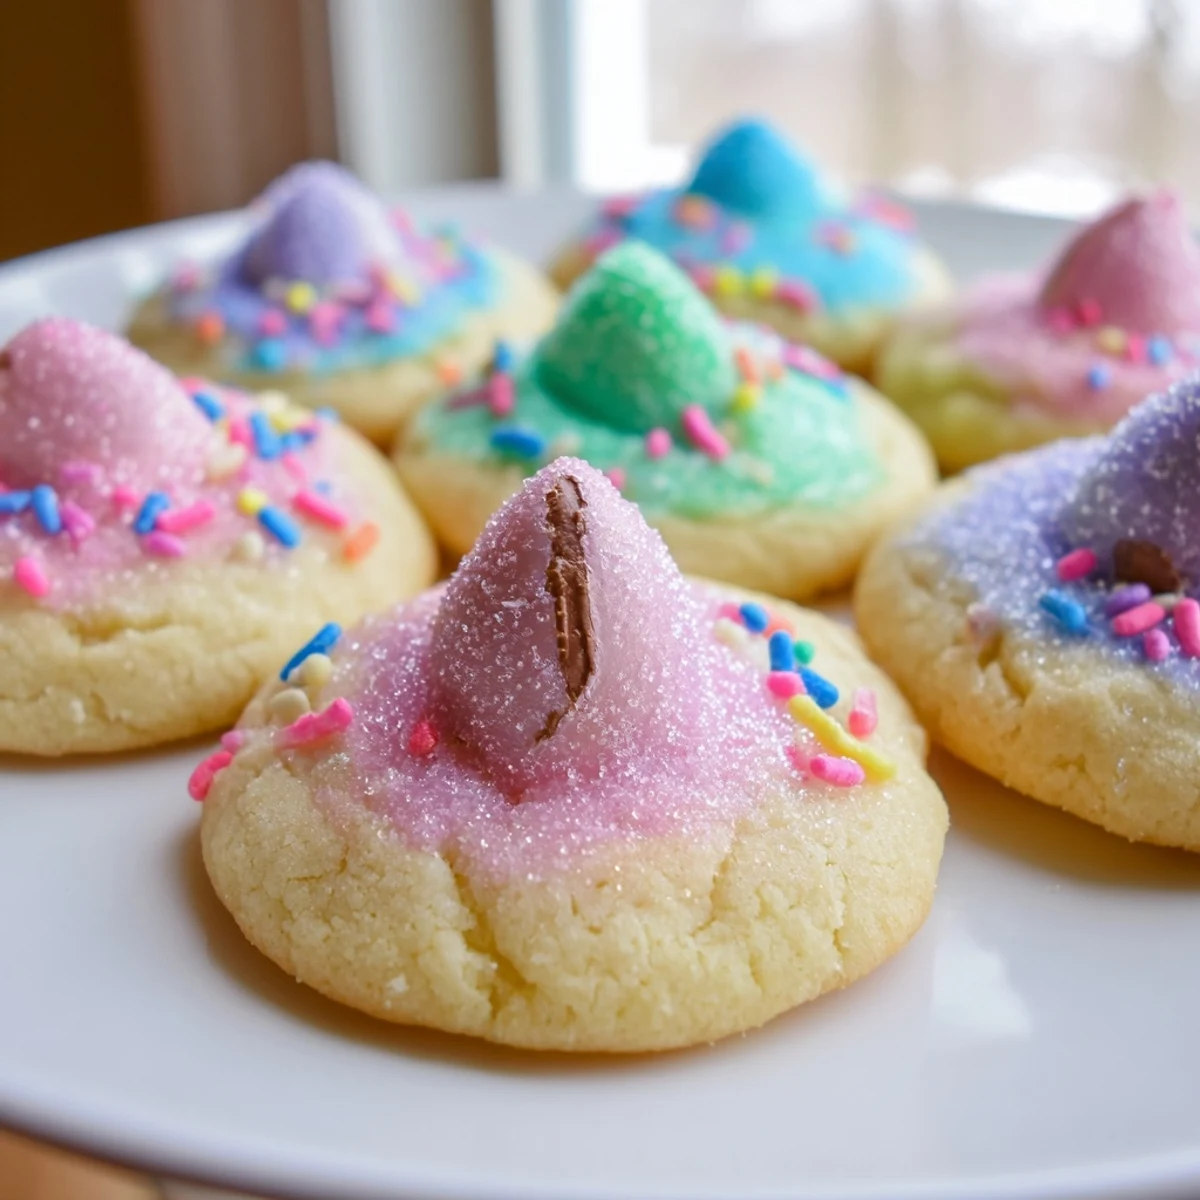
Save These soft, buttery cookies feature a classic sugar cookie base rolled in pastel sprinkles and topped with chocolate blossom kisses. The dough comes together quickly with pantry staples, and the entire process takes just 30 minutes from start to finish.
The key is pressing the chocolate kisses into the warm cookies immediately after baking—this helps them adhere perfectly while creating that signature blossom appearance. The pastel sprinkles add festive color and a delightful crunch that complements the smooth chocolate center.
These cookies store beautifully for up to a week in an airtight container, making them ideal for Easter basket stuffing, spring parties, or afternoon treats. They're easily customizable with different chocolate flavors or nut additions.
Last spring, my youngest came home from school absolutely beaming about an egg-shaped cookie project gone wonderfully wrong. We ended up making these soft blossom cookies together that afternoon, and the whole kitchen smelled like butter and happiness while spring rain tapped against the windows.
I made three batches for our neighborhood Easter gathering last year. Watching neighbors discover different colored sprinkles and chocolate flavors was better than any egg hunt I have ever organized.
Ingredients
- Unsalted butter: Room temperature is non negotiable here—cold butter creates sad, dense cookies instead of pillowy ones
- Granulated sugar: Creaming this properly with butter creates those pretty little cracks around the chocolate kisses
- Large egg: Bring this to room temperature too so it incorporates smoothly without curdling the butter
- Pure vanilla extract: Do not skimp—this is the background note that makes people ask what is different about your cookies
- All-purpose flour: Spoon and level it instead of scooping directly, or you will end up with dry, crumbly dough
- Salt: Just a pinch balances the sweetness and makes the chocolate flavor pop
- Baking powder: This gives the cookies their signature soft, cakey texture instead of spreading thin
- Chocolate blossom kisses: Unwrap them before you start baking—pressing them into hot cookies with wrappers still on is a mess I made once
- Pastel sprinkles or colored sanding sugar: Roll the dough balls gently so the sprinkles stick without crushing them
Instructions
- Preheat and prepare your baking space:
- Set your oven to 350°F and line baking sheets with parchment paper before you start mixing anything.
- Cream the butter and sugar:
- Beat them together until the mixture looks pale and fluffy, about 3 to 4 minutes—this step creates the tender texture.
- Add the egg and vanilla:
- Mix until everything is fully combined and the batter looks smooth and glossy.
- Whisk the dry ingredients:
- Combine flour, salt, and baking powder in a separate bowl so they distribute evenly through the dough.
- Combine wet and dry mixtures:
- Add the flour mixture gradually and mix only until you no longer see visible flour streaks.
- Shape and coat the cookies:
- Scoop tablespoon sized portions, roll into smooth balls, then coat them generously in sprinkles or sanding sugar.
- Space them out properly:
- Place dough balls 2 inches apart on your prepared baking sheets so they have room to spread slightly.
- Bake until just set:
- Bake for 8 to 10 minutes, removing them when edges look firm but centers still appear slightly soft.
- Add the chocolate kisses immediately:
- Press one chocolate kiss into the center of each hot cookie right after removing from the oven.
- Cool completely before serving:
- Let the cookies sit on the baking sheet for 5 minutes, then move them to a wire rack until fully cooled.
 Save
Save My daughter now requests these for every spring occasion, and we have started experimenting with different kiss flavors. The caramel filled ones disappear first every single time.
Making These With Kids
The rolling step is perfect for little hands—just put sprinkles in shallow bowls and let them go to town. I learned to double the sprinkle amount because half ends up on the floor and in their hair anyway.
Flavor Variations
White chocolate kisses taste amazing with a hint of almond extract instead of vanilla. Dark chocolate kisses work beautifully if you reduce the sugar by 2 tablespoons for a more sophisticated adult version.
Storage and Make-Ahead Tips
The dough balls freeze beautifully—roll them in sprinkles first, then freeze on a baking sheet before transferring to a bag. Bake from frozen, adding 1 to 2 minutes to the baking time.
- Store baked cookies in an airtight container with a piece of bread to keep them soft
- The sprinkles stay vibrant for about 3 days before they start to bleed slightly into the dough
- These ship surprisingly well if packed between layers of parchment paper
 Save
Save There is something magical about pulling that tray from the oven and pressing in those chocolate kisses while the house fills with vanilla warmth. Happy baking, and may your spring be sweet.
Recipe FAQs
- → Can I make the dough ahead of time?
-
Yes, you can prepare the dough and refrigerate it for up to 2 days before baking. Let it soften slightly at room temperature for easier rolling, or scoop into balls and freeze for longer storage.
- → What other chocolate candies work well?
-
While classic chocolate kisses are traditional, you can use white chocolate, caramel-filled, or dark chocolate varieties. Regular chocolate hugs striped kisses also add a beautiful visual contrast to the pastel sprinkles.
- → Why do the centers look unset when I remove them from the oven?
-
The centers should still be soft when you take them out—they continue cooking on the hot baking sheet. This softness is crucial because you need to press the chocolate kisses in while the dough is warm and pliable.
- → Can I freeze these baked cookies?
-
Yes, once completely cooled, store them in freezer-safe containers with parchment between layers. They'll keep for up to 3 months. Thaw at room temperature for about an hour before serving.
- → What if I don't have pastel sprinkles?
-
Colored sanding sugar, nonpareils, or even crushed peppermint candies work beautifully. You could also roll the dough balls in finely chopped nuts or leave them plain—the chocolate center will still create the classic blossom look.
- → How do I prevent the kisses from melting too much?
-
Press them gently but firmly into the warm cookies right after removing from the oven. The dough should be set enough to hold its shape but still warm enough to mold around the chocolate. Don't leave them in the oven after adding the kisses.