 Save
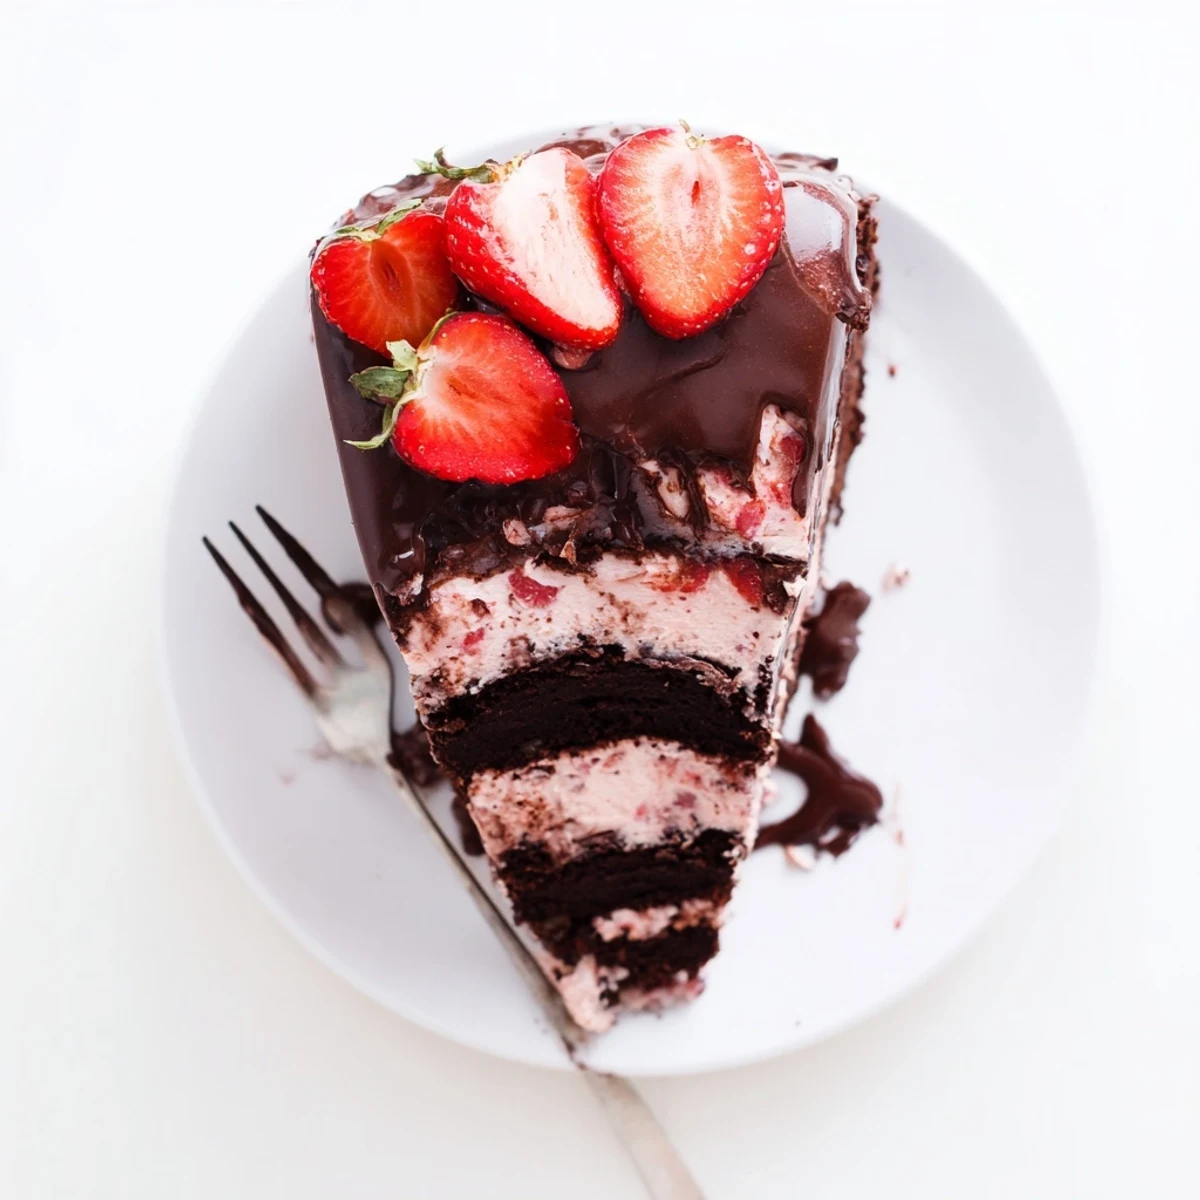
Save This stunning frozen dessert combines three beloved treats into one impressive creation. A rich, tender chocolate cake forms the base, topped with a thick layer of creamy strawberry ice cream. The entire cake is then enrobed in a glossy chocolate shell that cracks beautifully when sliced. Ideal for summer celebrations, birthday parties, or whenever you want to serve something truly special. The contrast of textures—soft cake, smooth ice cream, and crisp chocolate coating—makes each bite unforgettable.
The afternoon sun was pouring through my kitchen windows last July when my youngest announced she wanted a birthday cake that was actually ice cream. Not ice cream cake, she clarified, but cake AND ice cream all swirled together. I grabbed my springform pan and decided to wing it with whatever we had in the freezer. The chocolate shell that crackled when we cut into it made everyone at the table gasp.
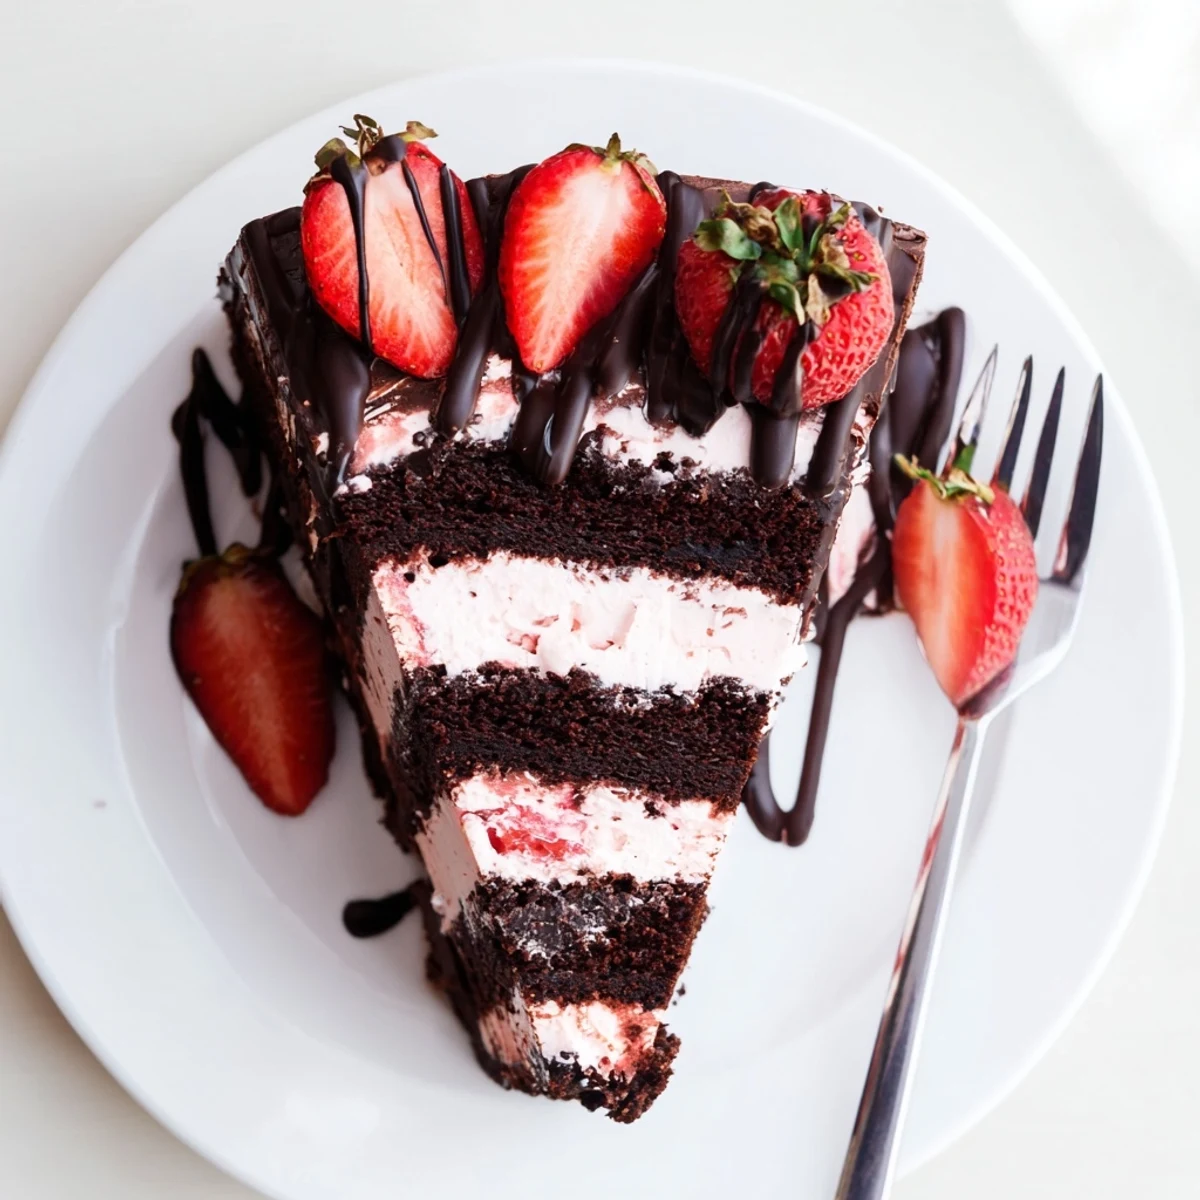
I brought this to a neighborhood potluck last summer and watched three different people ask for the recipe before they even finished their first slice. Someone accidentally left a piece on the counter during cleanup, and we spent the next twenty minutes debating who got to eat the melting remnants. The best part is how the strawberry ice cream seeps slightly into the chocolate cake layers while it freezes.
Ingredients
- 1 cup all-purpose flour: The foundation that holds everything together without becoming too dense
- 1/3 cup unsweetened cocoa powder: Use a good quality brand here since the chocolate flavor really matters
- 1 tsp baking powder: Helps the cake layer rise just enough to support the ice cream weight
- 1/2 tsp baking soda: Works with the cocoa to create the right lift and crumb structure
- 1/4 tsp salt: Essential for balancing all that sweetness
- 1/2 cup unsalted butter, softened: Room temperature is crucial or your cake will turn out tough
- 1 cup granulated sugar: Creates tenderness in the crumb while sweetening the chocolate base
- 2 large eggs: Bind everything together and provide structure
- 1 tsp vanilla extract: Pure extract makes a noticeable difference in the final flavor
- 1/2 cup whole milk: Adds moisture and keeps the cake from drying out in the freezer
- 1.5 quarts strawberry ice cream: Slightly softened makes spreading so much easier
- 2 cups semi-sweet chocolate chips: I have tested many brands and Ghirardelli gives the smoothest shell
- 1/4 cup coconut oil: This is what creates that magical snap when the chocolate sets
- 10 to 12 fresh strawberries: These are mostly for the wow factor on top
- 2 oz dark chocolate: Optional but the drizzle looks impressive and adds depth
Instructions
- Preheat and prep your pan:
- Rub butter all over a 9 inch springform pan and cut parchment to fit the bottom perfectly
- Whisk the dry ingredients:
- Combine flour, cocoa, baking powder, baking soda and salt in a medium bowl
- Cream butter and sugar:
- Beat together until pale and fluffy, at least 3 full minutes
- Add eggs and vanilla:
- Drop in eggs one at a time, letting each completely incorporate before adding the next
- Combine everything:
- Add dry ingredients and milk in alternating batches, scraping the bowl between additions
- Bake the cake layer:
- Pour into your prepared pan and bake 22 to 25 minutes until a toothpick comes out clean
- Cool completely:
- Let the cake rest in the pan until it reaches room temperature
- Spread the ice cream:
- Mound the softened strawberry ice cream over the cake and smooth with an offset spatula
- Freeze until firm:
- This takes at least 3 to 4 hours but overnight is even better
- Make the chocolate shell:
- Melt the chips and coconut oil in 30 second bursts, stirring between each
- Release and pour:
- Unclasp the springform ring, set the cake on a plate, and pour the chocolate over the top
- Garnish strategically:
- Arrange strawberry halves while the chocolate is still soft so they stick
- Final freeze and serve:
- Freeze 30 minutes more, then let stand 10 minutes before slicing
 Save
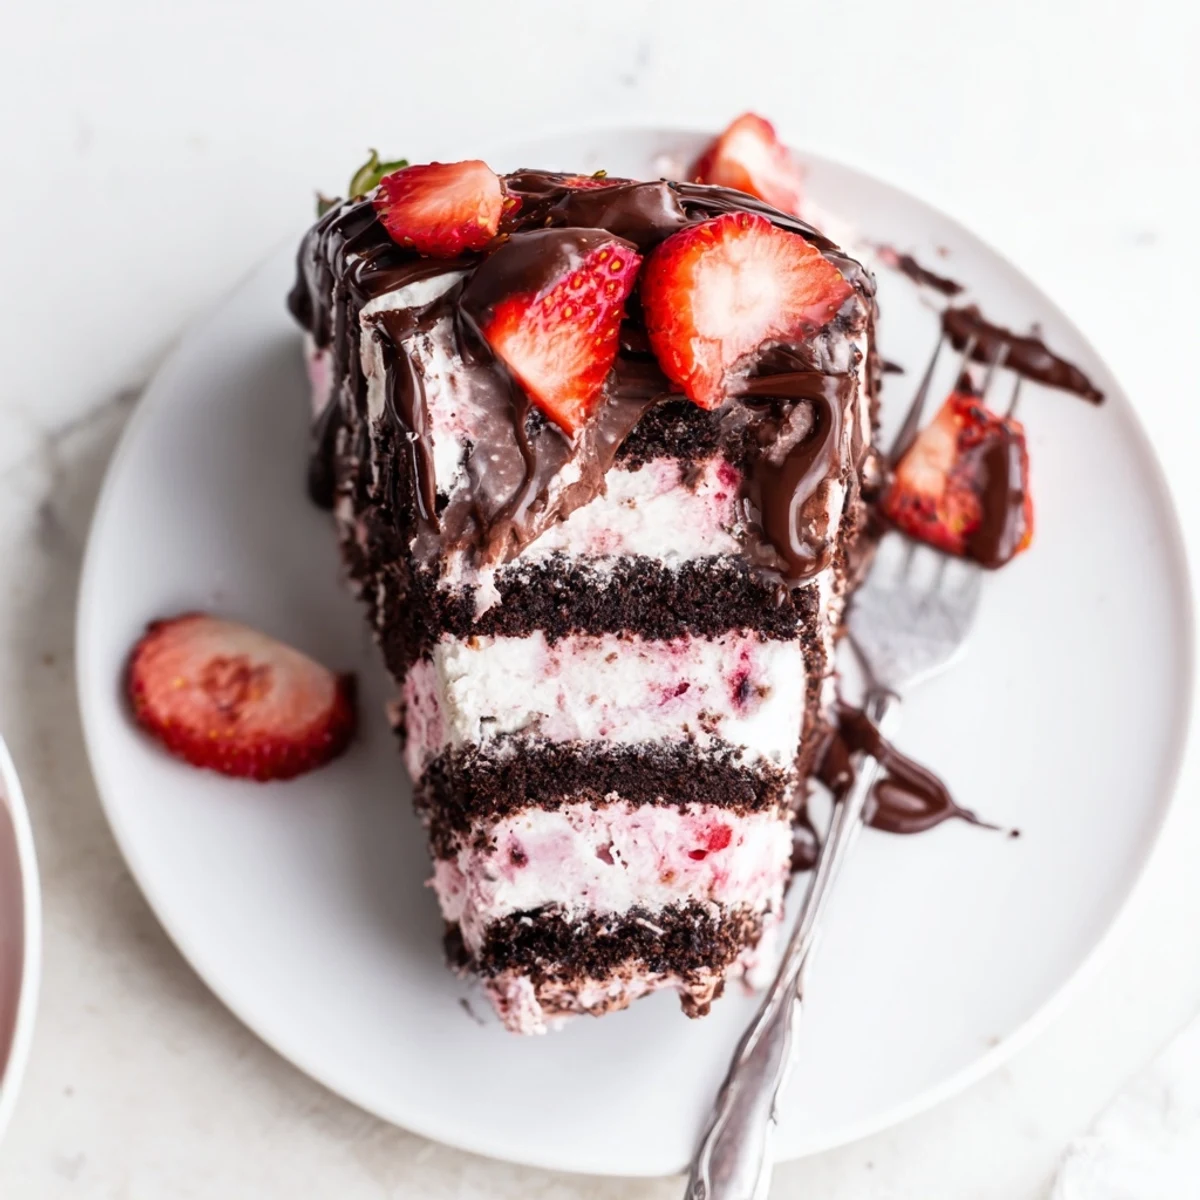
Save This became our go-to celebration dessert after the year I made three different birthday cakes and nobody touched them. The combination of textures somehow feels special without being fussy, and I love how it can be made days in advance. Something about strawberries meeting chocolate just feels like summer on a plate.
Making It Ahead
I have learned through many kitchen experiments that this cake actually improves after a day or two in the freezer. The flavors meld together and the texture becomes more cohesive. Just wrap it tightly in plastic wrap after the chocolate shell has completely set.
Serving Strategy
Take the cake out of the freezer 10 minutes before you plan to serve it. This softens the ice cream just enough for easy slicing while maintaining that crave-worthy contrast between cold ice cream and room temperature cake layer. Have your serving plates ready to go.
Creative Variations
The beauty of this dessert is how adaptable it is to different preferences and occasions. I have swapped out flavors based on what my family is craving or what fruit is in season.
- Mint chocolate chip ice cream with a chocolate cookie crust creates a thin mint vibe
- Try chocolate ice cream with chopped peanuts and a caramel drizzle on top
- Vanilla bean ice cream with fresh berries brightens everything up for spring
 Save
Save There is something deeply satisfying about hearing that chocolate shell crack when you slice into this cake. Every time I serve it, I remember that hot July afternoon and how a simple request turned into our favorite tradition.
Recipe FAQs
- → How long in advance can I make this cake?
-
You can prepare the chocolate cake base and assemble with ice cream up to 2 days before serving. The chocolate shell is best added the day of serving for optimal texture and appearance. Keep everything tightly wrapped in the freezer until ready to garnish and serve.
- → Can I use different ice cream flavors?
-
Absolutely! While strawberry pairs beautifully with chocolate, you can substitute vanilla bean, mint chocolate chip, or even cookies and cream ice cream. Fruit flavors like raspberry or cherry also work wonderfully with the chocolate elements.
- → How do I get clean slices when serving?
-
Let the cake stand at room temperature for 10 minutes before slicing. Use a sharp knife dipped in hot water and wiped dry between cuts. This helps the knife glide smoothly through the chocolate shell and ice cream layers for clean, professional-looking slices.
- → Can I make this without a springform pan?
-
A springform pan is ideal for easy removal, but you can use a regular 9-inch round cake pan lined with parchment paper with overhanging sides. The parchment handles will help you lift the frozen cake out before applying the chocolate shell.
- → Why add coconut oil to the chocolate shell?
-
Coconut oil helps the chocolate create a smooth, pourable consistency that sets into a crisp, crackly shell. Without it, the chocolate coating would be too thick and hard to cut through. The oil also prevents the chocolate from seizing when poured over the frozen ice cream layer.
- → Can I use homemade ice cream?
-
Homemade strawberry ice cream works beautifully and often has more intense fruit flavor. Just ensure it's churned and frozen to a firm consistency similar to store-bought before assembling. Soften slightly so it spreads evenly over the cake layer.