 Save
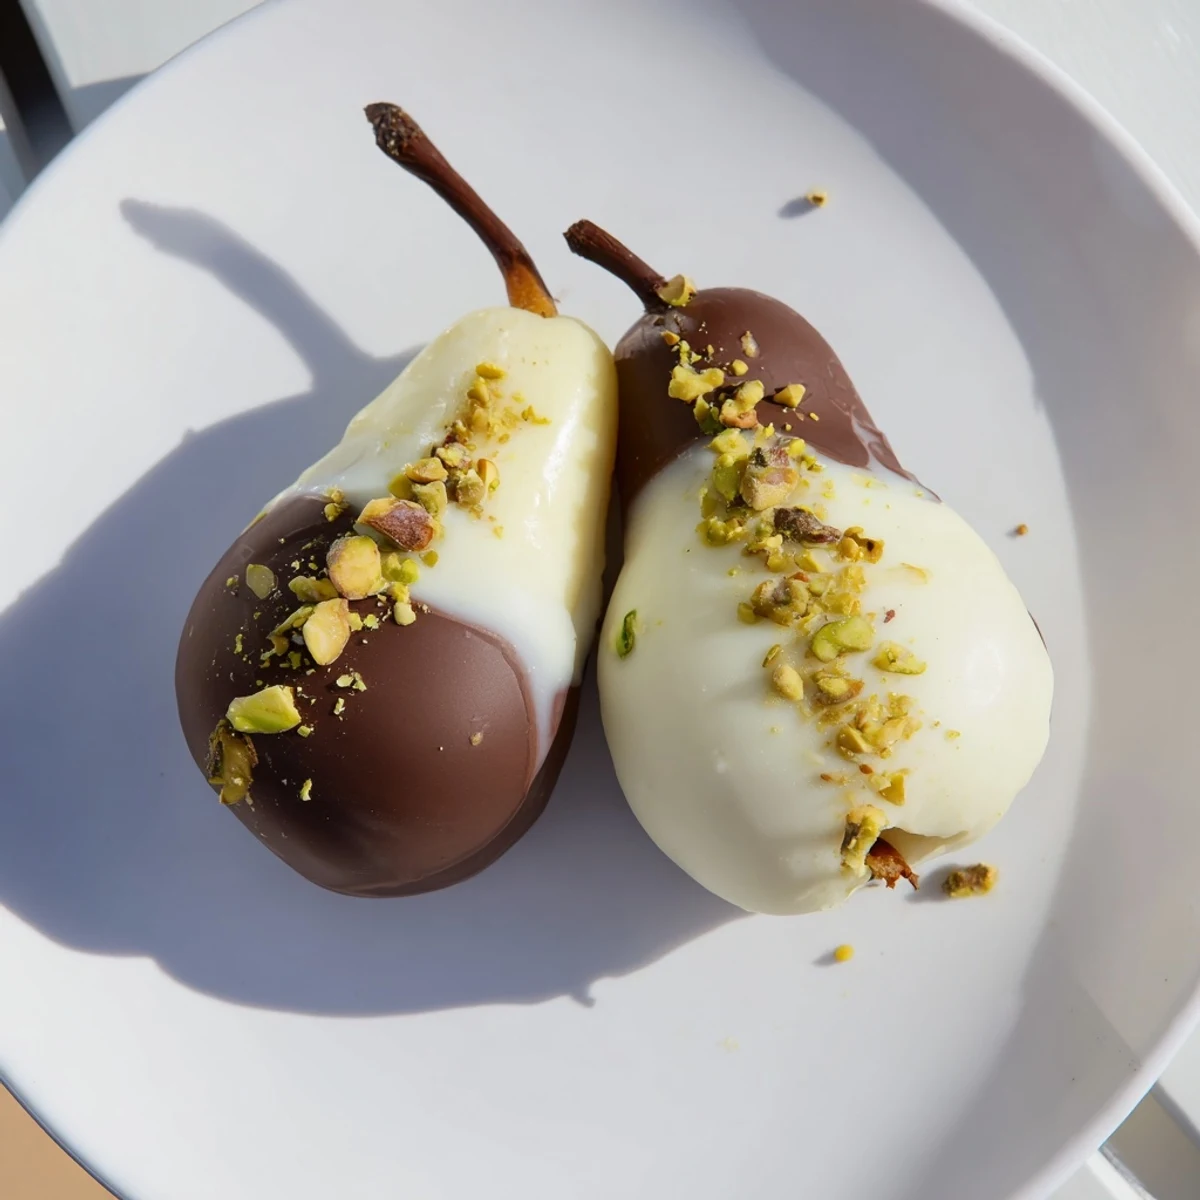
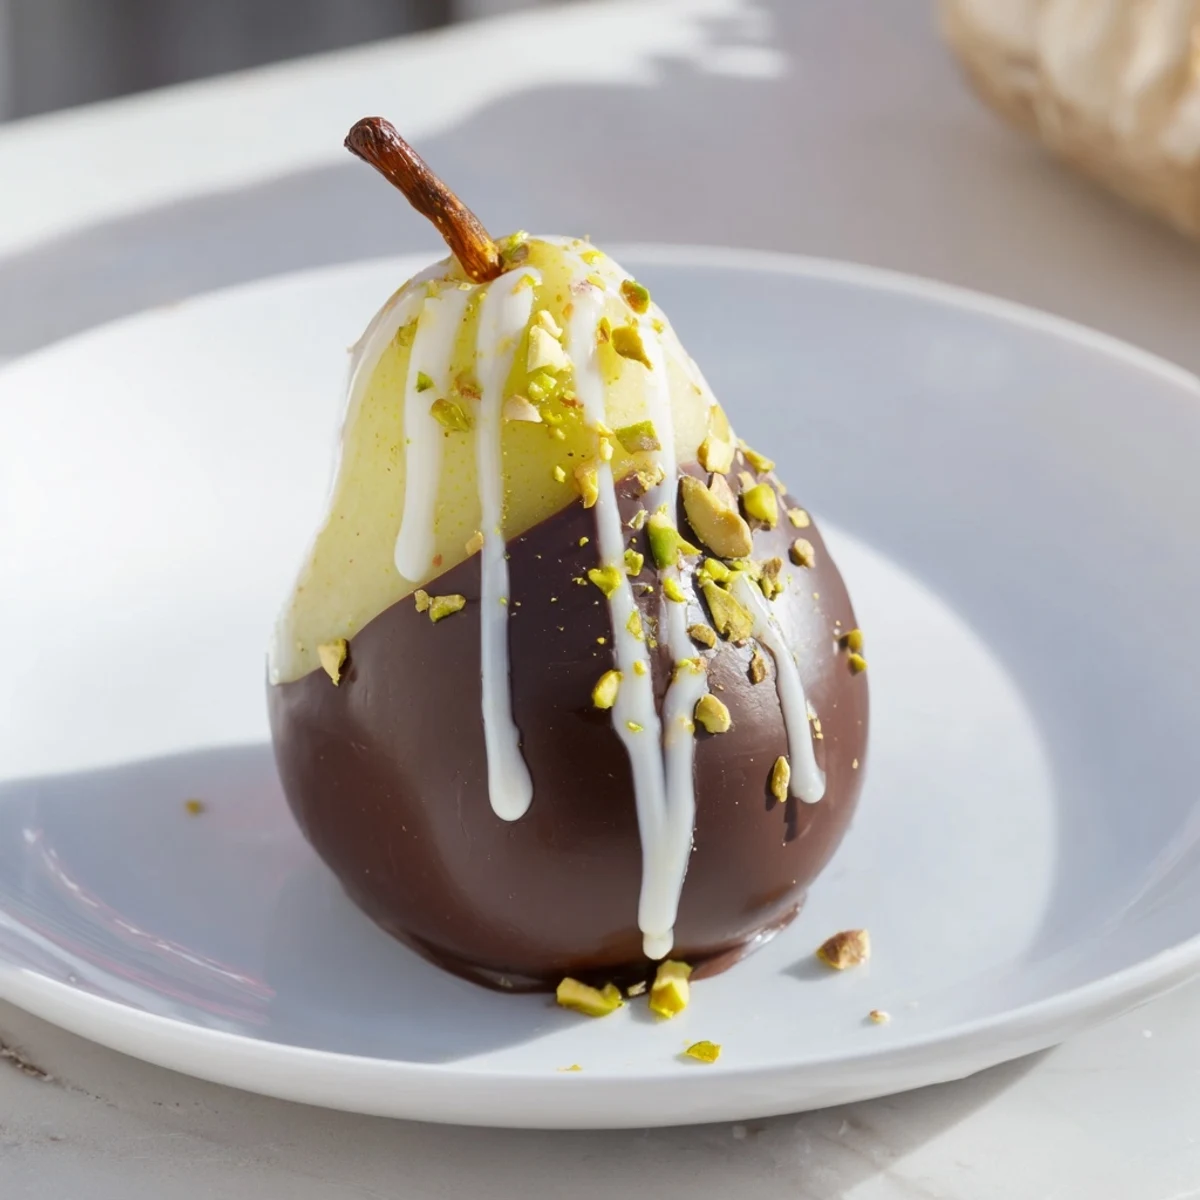
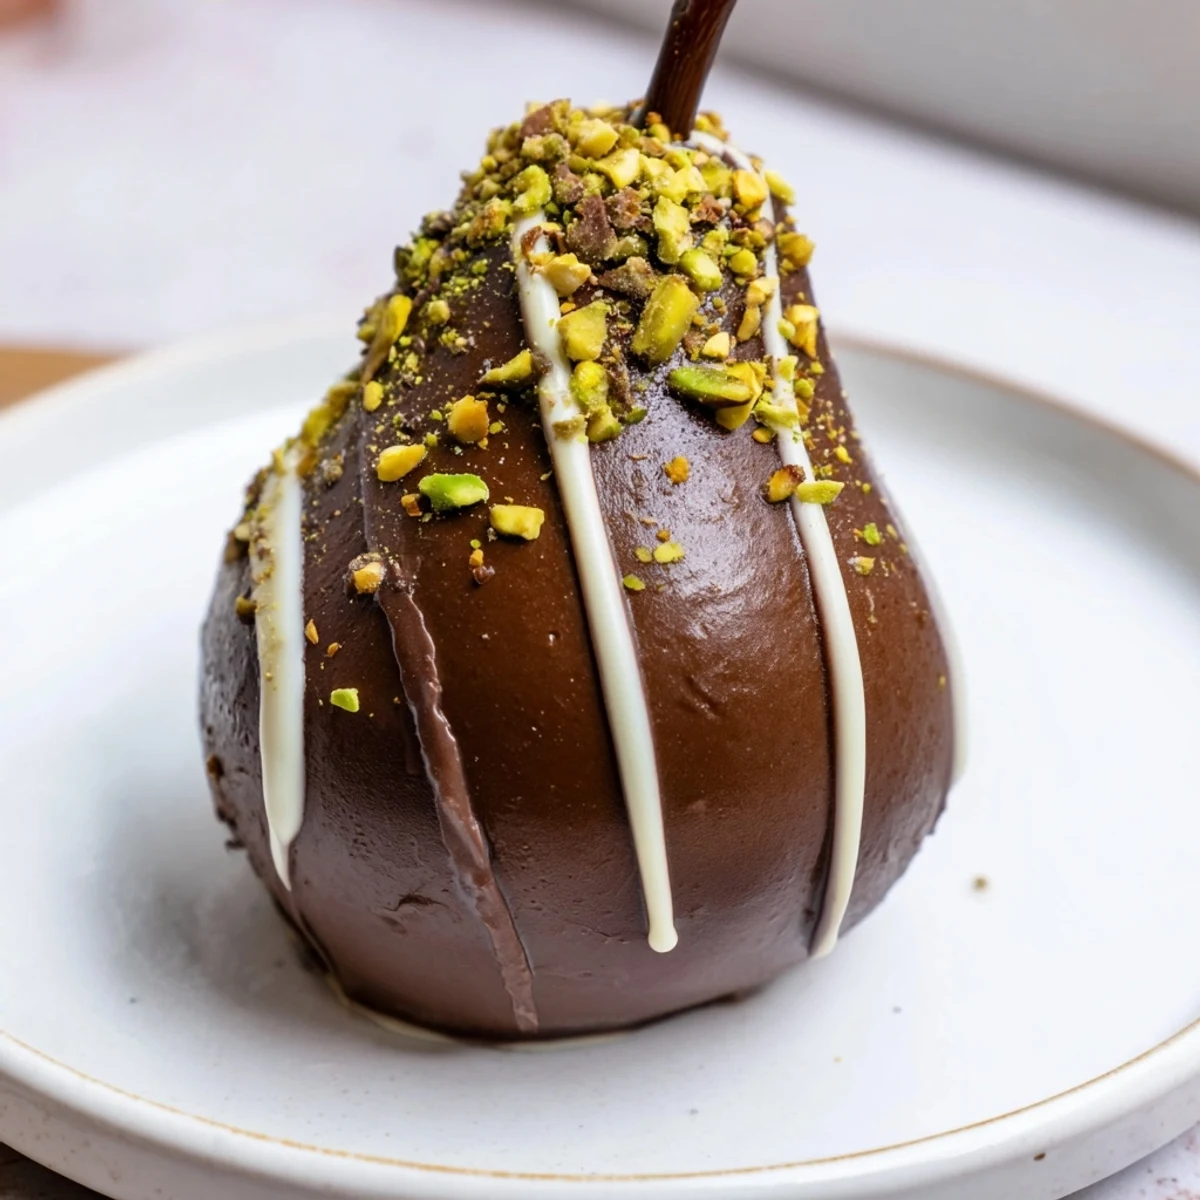
Save Experience the elegance of ripe pears dipped in velvety dark chocolate, enhanced by crushed nuts or delicate edible petals. This easy, sophisticated dessert offers a perfect balance of juicy fruit and rich cocoa flavor. Simply peel the pears, melt dark chocolate with butter in a gentle double boiler, and coat the pears before chilling until set. Add a decorative drizzle of white chocolate for an extra touch. Ideal for special occasions, this dessert pairs wonderfully with sparkling or dessert wine, making each bite a delightful celebration of simple yet refined flavors.
The kitchen was filled with candlelight and the faint scent of dark chocolate melting over the double boiler. I'd spent weeks hunting for the perfect pears, finally finding these beautiful Bosc specimens at the farmers market. Standing there in my apron, carefully dipping each pear while soft jazz played in the background, I realized sometimes the most romantic gestures are the ones you make with your own hands.
That Valentine's dinner wasn't particularly fancy—I'd made a simple pasta and thrown together a salad—but bringing out these chocolate-dipped pears changed everything. The way the candlelight caught the glossy chocolate coating made them look absolutely stunning. My date actually gasped when I placed them on the table, and honestly, that moment of pure delight was worth all the chocolate-stained fingers and anxious dipping attempts.
Ingredients
- 4 ripe but firm pears: I learned the hard way that too-ripe pears will slip right off the stem during dipping, so give them a gentle squeeze and choose ones that yield slightly but still feel sturdy
- 200 g high-quality dark chocolate (70% cocoa): Spring for the good stuff here because the chocolate is literally the star of the show and cheap chocolate will seize up and ruin your evening
- 1 tbsp unsalted butter: This secret ingredient makes the chocolate coating glossy and helps it cling to the pear like a dream
- 2 tbsp chopped toasted pistachios: The crunch against the smooth chocolate creates the most incredible texture experience
- 2 tbsp freeze-dried raspberries: Their tart punch cuts through all that richness and adds these gorgeous jewel-like specks to the coating
- 1 tbsp white chocolate: A drizzle turns these into something that looks like it came from an upscale chocolate shop
Instructions
- Prepare your dipping station:
- Line a baking sheet with parchment paper and clear off some counter space because once that chocolate starts melting, you need to move quickly and confidently
- Get your pears ready:
- Peel them carefully while keeping those stems intact—they're your handle for dipping and part of what makes these so elegant, then trim a tiny slice off the bottom so they stand proudly upright
- Melt the chocolate:
- Set up your double boiler and stir the chocolate with butter until it's completely smooth and glossy like liquid silk, then remove it from heat immediately to prevent seizing
- The art of the dip:
- Hold each pear by the stem and dip it about two-thirds into the chocolate, turning slowly to get even coverage, then let the excess drip off for a few seconds before moving on
- Add the magic touches:
- While the chocolate is still soft, sprinkle your garnishes over the lower coated portion and drizzle with white chocolate if you're feeling extra fancy
- Set and serve:
- Chill them for fifteen to twenty minutes until the chocolate is firm and snappy, then bring them out just before serving
 Save
Save Last Christmas, I made a batch of these for my family's holiday dessert, and my grandmother—who's notoriously critical of anything 'too fancy'—took one bite and declared it better than any restaurant dessert she'd ever had. Seeing her carefully lick chocolate from her fingers while smiling at me across the table made all the experimentation and failed batches completely worth it.
Choosing the Perfect Pears
After dozens of batches, I've found Bosc and Anjou varieties hold up best to dipping without turning into mush. The key is finding that sweet spot where they're ripe enough to be juicy but still firm enough to withstand the weight of the chocolate coating. I always buy extra ones just in case one decides to be problematic during preparation.
Getting That Glossy Finish
The butter isn't just there for flavor—it's what gives your chocolate coating that professional sheen that makes people think you bought these from an artisanal chocolatier. I've tried making these without butter, and while they still taste delicious, they look noticeably duller and less impressive. Sometimes it's the smallest ingredient that makes the biggest visual impact.
Presentation Secrets
These pears photograph beautifully and look stunning arranged on a wooden board or simple white platter. The contrast between the pale pear flesh, dark chocolate, and colorful garnishes creates such an elegant visual that they really don't need any additional presentation. Sometimes I place them on individual dessert plates with a small fork, letting their natural beauty speak for itself.
- Try drizzling the white chocolate in a zigzag pattern for extra visual drama
- These work beautifully as part of a dessert board with cheese and fresh fruit
- Leftovers (if you somehow have any) store best in the refrigerator for up to two days
 Save
Save There's something deeply satisfying about making something so beautiful with your own hands, especially when it's meant for someone special. These pears might look intimidating, but they're actually one of the most forgiving elegant desserts I've ever attempted—perfect for those moments when you want to create magic without spending hours in the kitchen.
Recipe FAQs
- → What type of pears work best?
-
Firm, ripe pears like Bosc or Anjou stand well and provide a juicy texture when coated.
- → How should the chocolate be melted?
-
Melt dark chocolate with butter over simmering water using a double boiler to ensure smooth, even melting.
- → Can I add toppings to the chocolate layer?
-
Yes, sprinkling chopped toasted nuts or freeze-dried berries while chocolate is soft adds texture and flavor.
- → How long do the coated pears need to chill?
-
Chill for 15–20 minutes in the refrigerator until the chocolate is fully set and firm.
- → Are there options for dietary preferences?
-
Use vegan chocolate and plant-based butter for dairy-free variations without compromising taste.